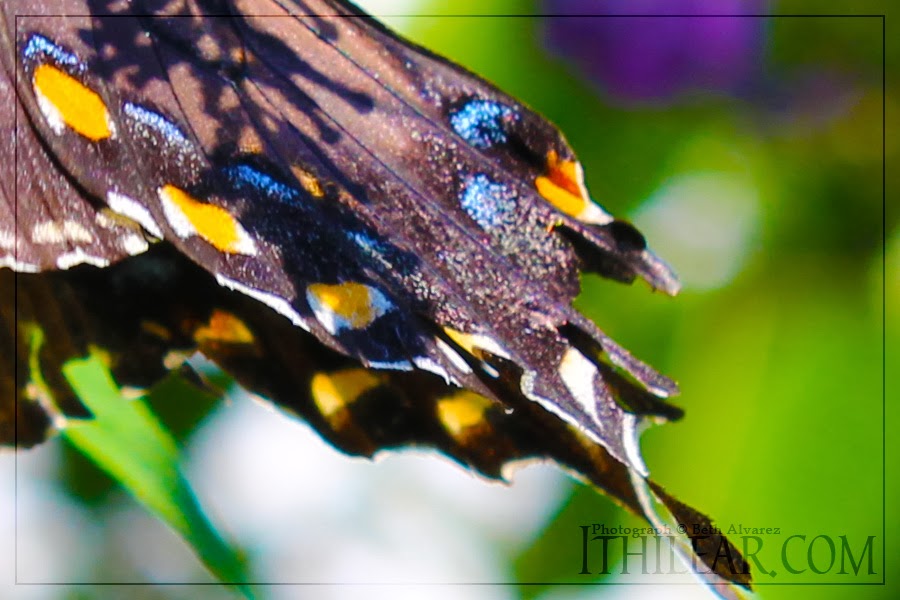
I don’t know what it is about me and spicebush swallowtail butterflies, but they’re always around me. This one posed for a lovely close-up at the zoo.
9 more pictures til I take a break from photo breaks.


I don’t know what it is about me and spicebush swallowtail butterflies, but they’re always around me. This one posed for a lovely close-up at the zoo.
9 more pictures til I take a break from photo breaks.
After several months of waiting, 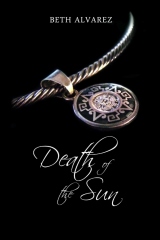 the much-anticipated paperback version of Death of the Sun is finally here!
The 6 x 9 inch paperback book has received some updates to the text and formatting for improved readability, modifications that are already visible in the updated Kindle and Smashwords editions and will be present in the Nook edition of the eBook early next week.
Paperback copies are available HERE for $9.99 USD + shipping.
I thought I’d be blogging about my dolls some more today, but I finished a big project a little sooner than I expected to. I thought I’d be posting this next week, but it’s happening this week, instead.
After I completed my latest novel back in August, I decided to let it sit for a few months, largely because time apart from your manuscript is good for both of you. Instead of diving right into editing my 180,000-word-long behemoth, I decided to revisit my previous work, instead.

I’ve spent the past three months polishing and nitpicking and then polishing some more, correcting as many missed mistakes in Death of the Sun as I could find. There weren’t many, which means most of the changes I made were more like enhancements, really. Three months gave me the time to comb over the text eleven times while I fixed phrasing that had come to annoy me and worked on one of the more difficult things I’ve done, formatting the whole thing for print publication.
It was an interesting experience and I learned a lot. I’m far from being an expert now, but I’ve learned enough to be annoyed by formatting mistakes I now notice in mass-market paperbacks!
Holding a real, bound-and-printed book that you’ve written is a very strange experience. There’s an element to it that’s very unreal, very dreamlike, the awed thought that I really did it. And knowing that I did it all on my own – The writing, the editing and formatting from cover to cover – brings a different kind of satisfaction. But I’d say the most valuable thing that comes from the whole experience is just how solidly it’s driven home the knowledge that no matter what may be said, not everyone can self-publish a book. There’s a big difference now between self-publishing and vanity press, and the former is an unbelievable amount of work. In the future, I’ll take some time to talk about all the different things that require attention during the course of self-publishing, but probably not until after the craziness of the holidays.
For now, I’ll just enjoy a few quiet weeks of playing with the baby and playing with dolls before hitting the grind of writing once again.
And for those who might be wondering, the paperback version of Death of the Sun is available here now and will be up on Amazon next week!

As I’ve mentioned before, I’m a big fan of big cats. Naturally, when we stopped by the zoo, I had to take a minute to get another picture of the tigers. As if the tigers aren’t enough, their exhibit is my favorite by far. In the early morning light, their habitat is truly amazing.
If you’ve spoken to me in the last few years, I’ve probably mentioned my dolls.
But what are they? Why do I have them? What made me interested in these creepy things?
I’d be happy to explain!
 |
| Not creepy in the least. Nope. |
It’s sort of funny, really. I never really liked dolls when I was a kid, didn’t really play with them much. I had a few Barbie dolls that were my favorites, sure, but they weren’t my favorite toys. I mostly played with action figures and toy horses. Dolls just weren’t my thing.
Then one day I found a picture of a peculiar looking doll online. I still have no idea what it was, but it got me started on a search that introduced me to the quite unusual world of Asian ball-jointed dolls.
I was maybe 16, and it only took one picture to make me fall in love with them. But the only easily accessible doll company at the time was Volks, and when I saw the price tag of the Super Dollfie line, I was floored. Despite my love of the peculiar dolls I’d found, I put the idea out of my head right quick. The doll I liked the most from what they offered at the time checked out at almost a grand.
Of course, hints of the idea stuck with me for a long time. I researched how to make my own, read up on sculpting techniques, looked at other options that would give me the same satisfaction. What I really wanted was an embodiment of the characters in my writing that had become my favorites, you see. But everything was cost-prohibitive, and eventually, I let the interest slip away while I pursued more important grown-up things.
After I was married, I found myself with a lot of free time and started looking into the dolls again. There were a lot more options now at much more affordable prices, and as an adult, the price tag of a few hundred dollars didn’t seem as astronomical as it did before. Good things were worth good money, after all, and the dolls were far from being mass produced. At first I considered getting a 26-centimeter Dollfie from Volks, but the more I shopped around, the more I felt like if I was going to get into having dolls, I was going to go all out. I started selling old college textbooks and saved money on the side. A year later, after business on Etsy took off, I ordered my first doll.
I have four dolls now, but really, there’s a lot of information to share, so I’ll be splitting the information about them up into several posts. For now, we’ll start with the obvious: The beginning.
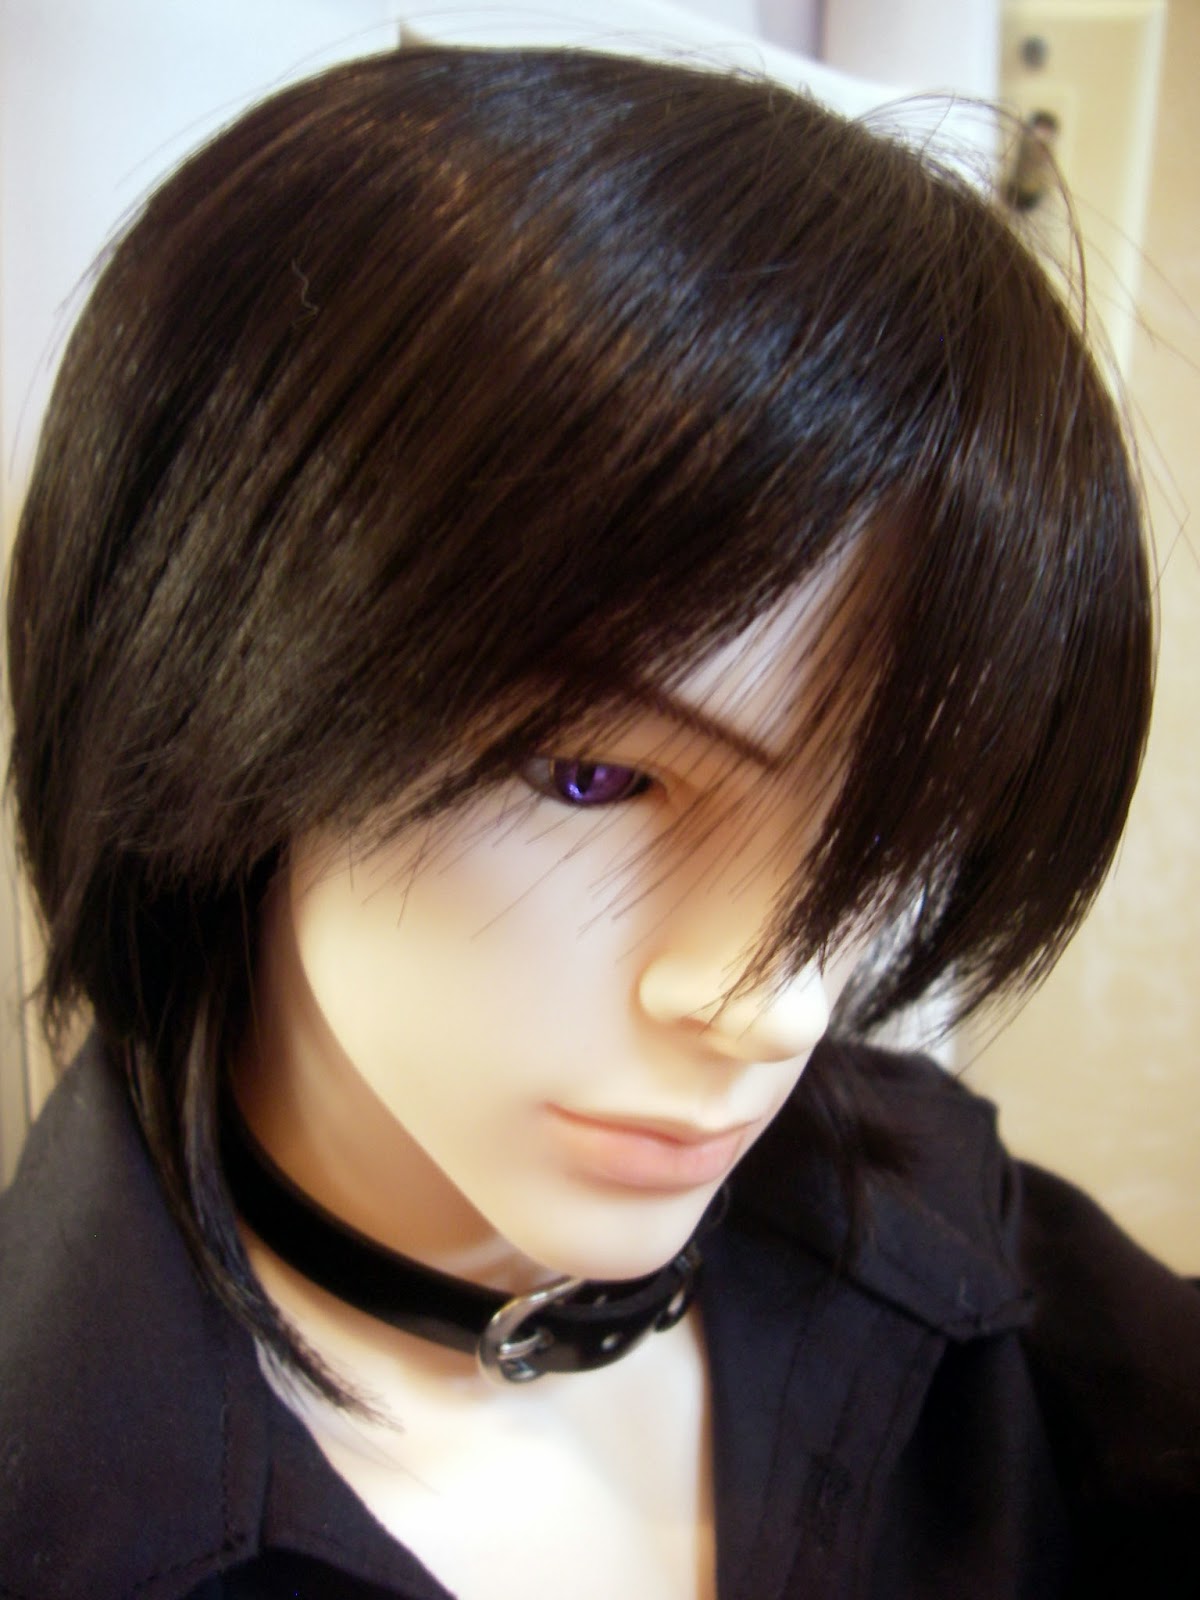
Meet Rune.
If you saw my blog post about my art room, you probably saw him on the table in one of the pictures.
Rune was my first doll and is still my favorite, though he’s very much a work-in-progress. He’s a whopping 70 centimeters tall, as big as my 11 month old baby!
For those curious of the specifics, he’s an Iplehouse EID Luo on the Super Hero body. Really and truly, the Model body would be a better fit for him, but it wasn’t released until almost a year after I bought him.
He’s had some special modification work done, such as making him a “hybrid” doll – I removed his legs and replaced them with those of a Soom Monzo. That was a feat and a half, really, given that the two companies’ parts were completely incompatible. The modification still isn’t done, it’s something I’ll be revisiting in the future and might document here since it’s actually a fairly interesting process that involves the use of power tools.
His hands are also special, as I sculpted them myself with no prior sculpting experience, and his eyes glow in the dark.
Rune is, by far, my favorite character out of all I’ve written through the years. His is a tragic story of politics and misunderstanding, though with any luck, you’ll be able to read it yourself in a year or two after the first book has been edited.
When I mentioned completing a book back in the summer, his is the one I’m talking about, though whether he’s a protagonist or an antagonist may be up for interpretation. In fact, most of my dolls are embodiments of characters from that story. But that’s a tale for another day, something I’ll write a little more about when I post next. After all, the next doll I’ll be speaking of is a doll version of the main character of the trilogy.

Okay, this particular photo of the baby is my favorite… it’s two babies, in fact.
In early October, I took a trip to the zoo with a few other local moms, including one who has a baby fairly close in age to mine. Needless to say, they got along quite well, and he was just dying to hold her hand.
When my husband and I bought our house, we got it with the idea that it would be a perfect home for the two of us to grow into. It’s a cozy little 3 bedroom, 2 bath house with a nice back yard. Neither one of us planned to be here forever, but after being here a few years, we’re finally settling in and really fixing things up.
The two unused bedrooms were less usable space and more just a spot to collect all kinds of things, mostly stuff we were getting rid of or meant to put into the attic and just hadn’t done it yet. One of these rooms became the nursery when our little girl was born, though since her crib is still in our bedroom for ease of nighttime feeding and changing, that actually meant it was a catch-all room for everything baby related.
The other room is the art room.
As you might have gathered, both me and my husband are artistically inclined people, and it was important to both of us that we have space to exercise our creativity. Especially me, since sewing supplies take up a great deal of room.
I’d managed to set up my sewing machine a long time ago, but with it being in the smallest bedroom, there wasn’t a whole lot I could do to make the space really usable without some help. Fortunately for me, that help came when Mom came to visit for a week. We cleaned and sorted, sorted and cleaned, then moved furniture all around. The end result was so pleasing that I thought I’d take a bit to talk about it here. I’ll include pictures, too, but fair warning – The room hasn’t been painted since we bought the house, so I covered the very blah cream walls with posters I’ve been collecting since I was 13!
Since I’m primarily a writer, it was also important to me that my workspace be set up to accommodate writing as well as other crafts. We pushed a table into the corner of the room, by the window, so I could easily use it as a desk for creating things, a space for cutting fabrics while I sew, and somewhere for me to set up my laptop while I write.

The bean bag chairs, too, are an addition for writing, because when it’s time to edit or proofread, it’s nice to be able to drop down in a well-lit comfy space to concentrate. Easy access to sunshine and fresh air is a bonus, too. You may notice in the picture above that the corner of the table has a very peculiar inhabitant. For those who haven’t “met” my dolls yet, don’t worry – I’ll be writing a bit about them in the near future.
Another big success was moving my old computer armoire into the corner and turning it into storage space for fabric. The big, heavy black hulk of a cabinet used to sit right next to the door because that was as far as I could muscle it on my own. It works much better in the corner, and also creates a nice place for me to set up the simple photography backdrop box I created for smaller things I make. The backdrop box is something I actually created a simple guide to making, so I’ll share that in the future. It’s super handy!

Speaking of handy, check out that awesome shelf on the wall. When I was still pursuing jewelry as an active hobby and business, I had so much stuff that I needed a rack to store it all on. I ended up using a piece of ladder, having my husband drill holes in it to run dowel rods through. It created a perfect place to hang necklaces and bracelets, as well as rolls of wire. The steps on the ladder slope toward the wall, which made it a perfect place to store bottles of paint.
Lastly, there’s the supply shelf and the filing cabinet that functions as my shipping station.

I do still actively sell a number of things online, so having all my packing materials in one place is infinitely helpful! Boxes used for shipping are piled on top, with a little space for an open box to be packed. The drawer contains things like tissue paper and bubble wrap, while strings, paper cutters, tape and padded mailers occupy the shelves. All the rest of my art and craft supplies fill the shelves, including some ammunition boxes full of stickers, colorful bags of silk flowers, and drawers for pencils and markers.
It’s not a perfect setup by any means, but I’m happy with it, and I’m looking forward to how all the organization will make it easy to create.
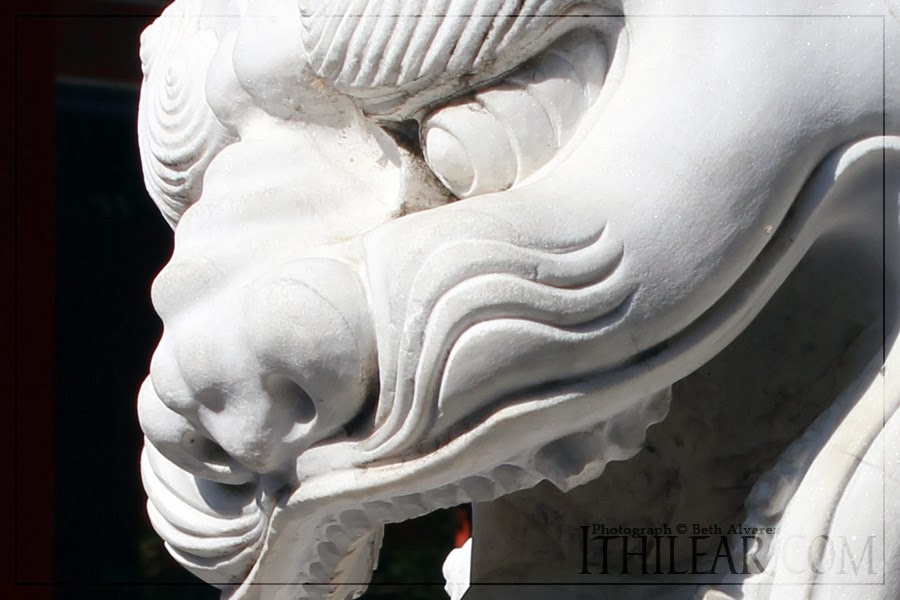
Photo break 40 already.
I hate to admit it, but I’m running out of shots that I think are good enough to warrant posting. The weather hasn’t been very agreeable and it’s made it hard to get decent pictures. Of course, I have about a million of the baby that are absolutely gorgeous photographs, but those are for me, not for the blog.
I think I’ll get to a full 52, so there will have been an entire year of Friday photographs, then I’ll take a short break while I rebuild a collection of photos to post.
Ah, Etsy.
It’s sad to say I have a love-hate relationship with the place. On one hand, it’s a great way for someone to make some money on the side, which is excellent for people like me who have a whole lot of skills creating and not a lot of opportunity to market them. On the other hand, I despise the place for the “quit your day job” fantasy they’ve peddled to hourly workers and housewives for years.
Let’s be real, here. Selling on Etsy isn’t going to make you rich, even if you work at it full-time. It isn’t going to pay your bills, either. But with a little effort and an understanding of how to make your shop seen, it can give you a few hundred dollars for extra spending money.
I’m not a part of that rat race any more, I have too many other things going on to maintain an effective presence on Etsy. But I do appreciate what the site has done for me, so I’m going to be passing on what knowledge I have. There’s a million Etsy tutorials and guides out there, but few that lay things out in plain language, which is probably why so many friends keep coming to me for advice.
And hey, if you’re interested in starting your own shop, feel free to use my sister’s referral link – It’ll give you 40 free listings to get started.
First things first, you need to make something. Once you’ve made something you think is worth selling, it’s time for the hard part: Putting it out where the world can see.
Speaking of seeing, we’ll start with photos.
If you ever ask for feedback in the Etsy forums, you’re going to get a bunch of people telling you to improve your photos. They’re not wrong – Product photos can take a while to master. I resisted for a long time, wanting to add my own special flair or style to the photography of the items I was selling. The best advice I have to offer on that front: Don’t.
For a long time, I tried to incorporate color and interesting props. This was a terrible idea, and I’ll show you why.

The photo to the right was what I used for my silver lily necklaces. I posed it on a book that I thought had particularly attractive pages. This was an awful mistake.
The photograph is busy, visually distracting. It’s hard to pick out the necklace at first glance. You see it, you see what it is, but you don’t see the fine details, which are really the selling point here!
Even though I loved the look of jewelry on books, I had to move on to something else. Unsurprisingly, when I switched to a less distracting, low-contrast background, the number of sales I made began to increase.

Compare the last photograph to this one. It’s the same lily piece, but doesn’t it stand out better on a plain background? Still, this wasn’t the best example of good photography. It was cleaner, less distracting, but it wasn’t as bright as it needed to be.
The best advice I can give you for photos is to put what you’re selling against a plain, stark white background. It won’t be pretty. You won’t like it. I don’t like it. But I do admit that it makes for really eye-catching product photos, and that’s what matters. If you don’t have access to a good photo setup for white background photos, try FotoFuze. It’s free. Remember, the first photo of your item is the most important. Make it bold. Make it stand out, make it burst from the boring white background of the Etsy pages. You only get one first impression, so you’d better make it good.

Now for the part I always hated, the dreaded item description.
The description isn’t just the body of text labeled “description” in the listing form. The description includes the title, materials and tags. All of these have to work together to make your item seen. I regularly had items appear on the first page of search results, which is great, because Etsy’s internal search function is the best marketing tool you’ve got. Learn to use it and use it well. We’ll start by looking at each part of the description, starting with…
Knowing your target audience.
Contrary to what you might think, your target audience is not the person you picture using what you’ve made. Your target audience is the person shopping for it. Most people who bought from me on Etsy were not buying for themselves, they were buying gifts for others. Understand what they’re looking for, and that will help you tag and describe your items better than anything. If someone is looking for a necklace for their mother’s birthday, they’re probably not going to run a search for an item name, they’re looking for an item type. This means Blueberry Kisses Necklace is a horrible title. Nobody is going to be searching for a Blueberry Kisses Necklace. They might, however, run a search for March birthstone necklace.
If you don’t know your target audience, you should pick a few possibilities for what a shopper might call your item, then keep an eye on which keywords bring you the most traffic in your shop stats. That’s your first indication of who’s looking for your item. This is your target audience. Use that knowledge to your advantage.
So how should you title things?
Your item’s title should be a short description. All the different pieces of the description have to work in unison to make something appear higher in Etsy’s search results. The trick here is to find your target audience and then beat those keywords into the ground.
For this example, let’s say you’ve made a white pearl bracelet using glass pearls. There you go! That’s your title.
White pearl bracelet.
That’s a bit short, of course, but that’s the wording that will appear first. You can add some other keywords in as other descriptors, other things a shopper might try when they’re searching the site. Use whole phrases, not a jumble of words.
White pearl bracelet, handmade glass pearl jewelry.
You can usually fit about 3 descriptions in the title. Keep them concise. If you’re unsure of what to title it, try shopping for comparable items first to see what phrases you, yourself, use when searching for it.
Next is the actual description.
I cannot stress how important it is to have a thorough description. Of course, thorough might not mean what you think it does, here. All the keywords and descriptions you used in your title? They need to go here too. Even better if your very first line repeats the keywords in your title.
This white pearl bracelet has been handmade using white glass pearls.
Describe the shape. The style. Always list product measurements in both inches and centimeters. Repeat the keywords any time it doesn’t seem forced. If it comes in gift packaging, say so. If you offer gift wrapping as an add-on, say so. If you offer the item in different colors, say so! It can be a slog to get it out there, but your description should be around 250 words long. Less isn’t bad, but more probably won’t be read.
Then come tags.
Tags on Etsy are annoyingly short. Most of your time will be spent rewriting your tags to fit within the 20 character limit.
When you tag, remember that these are not just descriptor keywords. Your tags should never be things like ‘cute’ or ‘feminine’ because people don’t search for just one keyword when they’re shopping for something.
Tag like it’s a second description, be as specific as possible in seeking your target audience. It might be tempting to tag your white pearl bracelet with jewelry, but don’t! It will be lost in the sea of jewelry on Etsy if you do. Instead, make it specific to what you’ve actually made, what you’re specifically selling. White pearl jewelry. White pearl bracelet. Pearl jewelry. Pearl bracelet. White pearls. These are terms a shopper will use, terms you’ve stated in your description and title both. Always use all of your tags! I see so many sellers on Etsy who only use half or so of their 13 tags. Why would you do that? That’s like renting a billboard and then only covering half of it with your ad! If you’re having trouble using all 13, don’t be afraid to look at the competition to get ideas.
Finish with materials.
Materials give you 13 tags, as well. Try to use them all by using as many relevant key phrases as you can. Repeat the important ones. In this case, ‘white pearls’ is a must, but you’ll also want to include phrases like ‘pearl beads’ or ‘glass pearls’ or ‘white glass pearls’ or even just ‘pearls’ because the more times you repeat that word, the higher Etsy will rank you for relevance when someone’s looking for… well, pearls.
Most importantly, always be honest when you’re listing the materials. Don’t mislead anyone by using tags that aren’t truthful. They’re not natural pearls or freshwater pearls, so don’t describe them as that. You want your customers to know exactly what they’re getting and exactly what to expect.
Do these things, and you should be on the right track.
Questions? Concerns? Trouble understanding what I’ve said?
Comment here any time and I’d be happy to help you start building your own success.

Yep, starting November with another rose. They’re just so pretty, how can I not?
