Beth Alvarez - Author of Epic Fantasy
  • Using a planner to organize writing

    Using a planner to organize writing

    Considering my well-known love of lists, it surprised no one when last year, I also fell in love with my first day planner. It let me organize all my work and projects and, with the improvements it made to my time management, it helped me accomplish more things faster. With such a productivity boost, I immediately wanted to expand my planner usage to make differences in my writing life, too.

    I started by adding a section to my normal planner, where I compiled ideas and information, notes for editing, and overall schedules I wanted to adhere to with my projects. The problem was I didn’t have enough space. My planner was already bulging with all the organizational charts and notes I kept inside, so there just wasn’t room for anything else. The solution? Well, for me, it was getting another planner.

    green planner

    Planners can be cost prohibitive, which is why several of my friends who’ve started using them opted for a regular 3-ring binder with home-printed pages. That’s a great approach, especially if you aren’t sure you’ll like a planner system enough to invest in it. For me, though, I knew I needed something small and portable. I take my writing projects with me when I travel, so something small enough to fit into my purse or the diaper bag was ideal. When the local Michaels introduced their new line of planners, I decided it would be ideal for my needs. I picked green, one of my two favorite colors, and got started as soon as I got home.

    I didn’t purchase any of their inserts, creating my own at home instead. Already owning a paper cutter and an adjustable 3-ring hole punch, I had everything I needed to customize my planner. It came with 3 sections, which was perfect, since I had 2 stories I was working on and that would leave me room to develop plans for one more, or just take random notes. As soon as I got home, I started working on what I wanted my writing planner to include.

    There are lots of options for printable planner sheets for writers. Unfortunately, few of them are free. Those that are tend to be run-of-the-mill and not so useful to me. Most are charts for creating character profiles, which is something I don’t typically do. I prefer my characters to be more organic, and I prefer my planner pages to be devoted to the things I use often. I started simple with things I knew I needed:

    • An outline for the novel
    • A checklist sheet for notes I can mark off as I edit and address them
    • Lined note paper for things that don’t fit in the margins
    • Graph paper for tracking plot high and low points by chapter

    And then I started by creating those for the two books I’d be putting in the planner right away. One of them was already half done, so I color-coded the text in the outline to show what I’d already covered, what I’d missed or decided to move, and what hadn’t been touched or considered yet. This quickly showed me another benefit of working with physical paper: it was easy to take a single page out and move it farther into the outline, effectively rearranging events.

    SB outline pages

    Once the outlines and the first few necessities were printed, punched, and tucked into the planner, this was enough for me to get started. I made flags out of stickers attached to paperclips and used them to mark my place on each outline. Then I made a list of what else I’d want to add over time.

    • A basic character template with vital information only
    • A simple template for the setting
    • A printed map of the worlds I’d created or real-world region I used
    • A numbered, lined sheet for planning chapter titles and major edits
    • Calendar sheets for tracking timelines
    • A zippered pouch with colored gel pens and highlighters for outline notes

    As of yet, I haven’t added these pages to my writing planner, mostly because I’ve not found any premade templates that suit what I need–with the exception of the zipper pouch, which just hasn’t been added because I haven’t found one I like that fits into my new planner. I’ve made a few templates of my own, which I’ll share here and explain the choices I made for each sheet. PDFs will be provided so you can assemble your own printable novel planner of the same make if you like the way I organized mine.

    In the meantime, converse with me! What kind of pages would you want in your novel planner?
    Save

  • Tea review: Tazo Refresh Mint green bagged tea

    Tea review: Tazo Refresh Mint green bagged tea

    Thus far, I’ve devoted all my reviews to loose leaf teas. They’re definitely my tea of choice, but it’d be unfair to overlook other options as well. Bagged tea is the kind most commonly sold and consumed, and it’s readily available in supermarkets in a wide variety of flavors. Some tea fans don’t even own the infusers necessary to enjoy a cup of loose leaf tea, and they’re perfectly happy with their pre-mixed blends and bagged varieties.

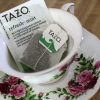
    One of my husband’s coworkers is a tea drinker like me, but his choices are selected out of the grocery store aisles. Knowing I like teas, he occasionally sends individually wrapped tea bags home with the mister for me to try. Today’s review is one of those.

    IMG_4199
    Tazo is one of the slightly pricier brands found in supermarkets, and they offer a wide variety of flavors. Though the company is owned by Starbucks, who also owns Teavana, Tazo’s line of teas is distinct from Teavana’s. Both lines take a new-age marketing approach, though it’s more prevalent in Tazo’s line, and is sometimes reflected in their flavor namings.

    The individual Tazo bags have a thin plastic lining inside the bags, making them waterproof and airtight, keeping the tea fresh for longer. The packaging is simplistic but attractive, and the backs of the bags offer steeping instructions, just in case the tea became separated from its box. I found the directions on the Refresh Mint flavor to be dubious, however, calling for 212 degree water and a steeping time of five minutes. Too hot and too long for a green tea, as far as I knew. I opted to brew mine for about two or two and a half minutes, using 170 degree water.

    It brewed bright and fragrant, though even brewing for the shorter period of time I did, I caught the faintest hints of bitterness beneath the flavor of the mint.

    The green tea is a subdued taste, meaning the mint stands out. It’s really more a mint herbal with touches of green tea than green with mint, but the flavor is pleasant. Its mix of spearmint, peppermint, and tarragon make it a unique mint blend, especially since the spearmint is what stands out most. I didn’t detect any of the tarragon flavor, which is a plus for me, as I’m not a fan of anything that tastes like anise.

    Because most mint teas tend to taste like candy if sweetened, I left this mix alone, drinking it straight. There was plenty of robust flavor, and the cooling sensation of the mint did make it very refreshing on the hot and humid day I drank it. It’d be an excellent mix to add to a pitcher of iced tea for something just a little more cooling, and that’s something I think I’ll be trying later this afternoon.

    Overall, it lacks the robust tea taste you might get with a loose leaf tea blend, but it definitely holds its own as far as enjoyability and unique flavor goes, which just goes to prove that loose leaf isn’t the only way to enjoy tea.

    Save

  • Changing gears in the middle of a project

    At the beginning of June, I hit the halfway point in my major WIP and discovered I’d written myself into a corner. Despite using a detailed outline, things became derailed enough that I had to do some serious work rearranging plot points and adding new ones to get to the ending I had in mind. This took days, but I didn’t want to lose momentum by not writing every day, so I decided to start working on something else while I worked out the problems.

    Unfortunately, this became a problem on its own. The new project took off beautifully, and by the time I had the half-finished book’s issues worked out well enough to let me get back to writing, I didn’t want to put it down. I don’t have time to work on two projects at once, so this presented a tough decision. Which book gets put aside?

    It’s a plight many writers share, and there are never any good solutions.

    On one hand, pushing too hard on a difficult project puts you at risk of burning out. On the other hand, if we wait to write only when we feel inspired, we’d never make any progress.

    Even worse is the idea of only writing when inspiration strikes for a certain project. I’ve been the writer with a half dozen projects going at once, none of them finished, none of them even remotely close.

    Project-hopping can be fatal to all projects involved, but sometimes, it works out for the best. For my projects, I ultimately decided the new project was the one that needed my full attention. There were a few reasons for it.

    1. The new project was shorter.

    I love my epic fantasies, but writing several books in a row that break the 150k word mark, with little hope of cutting them down in size, takes a lot out of you. There’s a lot of work to be done to ensure they stay orderly and don’t contradict earlier installments in the series. My smaller side project was also a stand-alone novel, meaning I only had to keep the timeline straight for one book worth of content. Being simple, compared to what I’d been writing, I realized I’d be able to complete this book much faster than the epic, even though it was already halfway complete.

    2. Having a complete story meant less wasted time.

    Ideally, I’d like to get to the point where I have books in every stage of completion so I can work in a steady cycle. I’d have one in the writing stage, one being edited, and one being sent for queries. This isn’t very realistic though, since it takes me less time to edit a book than to write one, so I wouldn’t be done writing by the time the book being edited was ready to move on to queries. The next best thing I can manage is having one book in the process of being written, and one in the process of querying. Since I could finish this one faster, it’d give me something to query for while finishing the writing stage for the bigger book, meaning I’d be wasting less time between production and presentation.

    3. It was a better fit for its genre expectations.

    This is a big problem I’ve encountered in my work. Either it doesn’t fit the genre cleanly enough it to be desirable to traditional publishers, or it’s a great fit for the genre, but longer than what they’ll accept from an author without previous publishing credits in said genre. The side project I picked up worked out ideally for fitting into its genre label, and its projected length fell around 75,000-80,000 words, when the idea length in its genre is right around 80,000 words. It meant chances of publication were better from the get-go. The other project is more important to me on a personal level, but it’s also the third book in a series where the first hasn’t yet found representation. On the whole, the side project stood a better chance of furthering my career.

    4. It was easier to write.

    As I mentioned in the first point, it’s easier to write something that’s a standard length, stand-alone novel. But it’s also easier to write because it’s a modern setting, so there aren’t any times when my writing is interrupted by the need to determine whether or not a particular phrase or object is out of place in a historical timeline. It used concepts I was already familiar with and didn’t need much ground work, and the only references I’d need were in encyclopedias I already had on my bookshelf. Without these extra constraints, it just wasn’t as taxing to write it, letting me work fast without exhausting myself. My word counts each day averaged much higher, one of the reasons I’d be able to knock the book out fast, even though the word count I’d have at the end was the same as what I’d have if I finished the fantasy story.

    With all that said, I won’t talk much about the project yet. It’s inching closer toward being complete, at which point I’ll give it a thorough editing, and then we’ll talk about what I’ve done.

    Have you ever dropped a project midway through?

  • Tea review: Self Care blend tea from Plum Deluxe

    Tea review: Self Care blend tea from Plum Deluxe

    On a particularly stressful day, I decided it was finally time to break out the sample packet containing Plum Deluxe’s Self Care tea blend. It was my first time trying a honeybush tea, so I was interested in seeing how it compared to the rooibos base people often compare it to.

    Self care tea from Plum Deluxe

    Like the other blends I received from Plum Deluxe, it was an attractive mix, rich in warm color and filled with fruit bits and bright marigold petals. However, when I opened the packet, I had my doubts about this one. I’ve never had a batch of samples where I liked all of them, and the smell of apricot overpowered everything else when I gave this blend a sniff test. Since my doubts about the Reading Nook blend were proven unnecessary, this had to be the one that didn’t do it for me, right?

    Personally speaking, I didn’t see much resemblance between the flavor of the honeybush tea base and the flavor of rooibos. While rooibos has a bit of a cinnamon flavor, the honeybush tea provided a slightly herbal and naturally sweet taste, which was accented nicely by the flavors of fruit. Despite the overwhelming apricot fragrance, I found that flavor to be much more subtle. Likewise, the typical tartness of elderberries was masked nicely by the sweet taste of apple.

    The apple was the flavor I found most prominent, and it made the brew sweet and smooth. While the company recommends this tea with honey and cream, I drank most of it straight, only experimenting at the end of the cup for sake of this posting.

    Sweetening the tea brings out the flavor of the apricot, while a bit of milk toned down the flavor of the sweet fruits, bringing out the honeybush base and a hint of tartness from the berries. Both pleasant changes, but I think drinking it straight is still my preferred way of enjoying this tea–especially since as an herbal blend, a strong brew won’t be bitter.

    Honestly, I’m surprised to have found all four blends I received so delightful, as there’s always been one that struck out for me.  With this experience under my belt, though, I’m looking forward to trying more teas from Plum Deluxe in the future.

    Save

  • Encouragement Costs Nothing

    It was a happy event. Our young next-door neighbor had just graduated from high school and been accepted to one of her universities of choice, her major chosen and her moving plans underway.  There were congratulatory balloons everywhere from the celebration, including inside our house, after our three-year-old convinced her to share. We didn’t attend the party, but we gave her a card and a gift, and she met me at the chain link fence between our cozy back yards to thank us.

    We had the usual polite small-talk. With me being eleven years her senior, it didn’t seem she’d want to spend a lot of time chatting with me when she had a lot of friends and a free summer ahead of her. I asked about her major; she said English. Despite writing being my first thought, surely because of my own profession, I decided to play it safe and ask if she planned to teach. No, she said, she wanted to do professional editing for publication. And it was there, in the subtle way she kept smiling though she lowered her eyes, that I felt an immediate rise of anger.

    See, I’m not even sure she knew she did it. But that one tiny gesture told me a story like a thousand others. That, not her parents, as they’re the loving and supportive type, not her friends, or they wouldn’t be her friends, but someone–some time–told her that the path of her dreams was not viable.

    It’s a story almost everyone shares, and though it cuts us deep when it happens to us, we always manage to pass it on to the next generation. That what they want to do isn’t viable as a career option; that it’s too hard; that their chances of being hired are slim; that it’s great for a hobby, but not a career; that there’s not enough money in that field to support a family.

    I was excited. I told her how incredible I thought that was, that I thought it was an excellent choice, that she would love it, and that the written world was my field, too. Her smile brightened and I took it to mean something. Lots of friends and relatives had likely encouraged her, but I was saying something from the other side. I already had experience writing, editing, working with publishers. Though I devote most of my time and attention to being a stay-at-home mom and the whole “books” thing is just a side gig now, I had done what she wanted to do, and that made it seem that much more attainable.

    Careers can crop up in the most unlikely of areas, these days. With the advent of the internet, we can make our way through methods no one ever would have dreamed of before. Encouragement costs us nothing, but it can be what makes or breaks a person’s dreams. It didn’t even take a minute to share a few positive words, but it made a difference.

    The next time we crossed paths, both of us walking to our cars to run errands, she told me she’d declared her major and had all her classes lined up. No more timid lowering of the eyes, no more somewhat-sheepish smile while she laid her heart bare by sharing her interests. All I saw was the excitement and enthusiasm, the eager energy of someone just beginning on the best parts of their life.

  • Making doll eyes: Cost vs savings

    There’s a popular graphic floating around on social media sites that says “Why buy it for $7 when you can make it yourself with $92 of craft supplies?”

    Anyone interested and do it yourself route already knows that DIY isn’t always the way to save money, especially when you’re making a limited number of things. If you’re good, you might get a return on your investment by turning to options like Etsy, but don’t count on it.

    Working with my dolls, I encounter this scenario frequently. Do I buy it, or do I use my pre-existing skills to make it myself? I have the advantage of having a large collection of crafting tools already, so if I can get the materials cheap, it’s almost always in my best interest to do it myself. For one, I’m on a tight budget, which means anything that can save me pennies is something worth looking into. And then sometimes I bite off more than I can chew.

    When shopping for doll eyes after the arrival of my two newest, I had two options: Buy pre-made eyes from a company I was already familiar with, or learn to make my own. I had two other dolls waiting for proper eyes, so assuming I was happy with one pair each and bought from said familiar company, I was looking at a total of $100 plus international shipping. But what if I wasn’t happy with the eyes I got? What if the color didn’t look like the photos? And what if I got more dolls later?

    Without as much consideration as I probably should have given it, I decided to take the route of making my own. I figured it would save me money in the long run. After all, how hard could it be?

    Turns out it’s not always easy to make stuff, especially when that means learning new skills. I needed a variety of materials and new tools. And a lot of them were things I’d never worked with before.

    The concept wasn’t too tough: I’d need to sculpt bases, make a mold of them, cast bases in resin, paint them, and top them off with clear resin. The problem was I didn’t have the kind of paints I’d want. Or any of the rest of the stuff, for that matter. So first came a materials list. Here’s the breakdown of what I used.

    • Moldable plastic and round beads for making sphere molds – $0 (Already on hand)
    • Polymer clay and filler putty for sculpting bases – $0 (Already on hand)
    • Sandpaper and files – $0 (Already on hand)
    • Plasticine clay – $0 (Already on hand)
    • Glitter and gemstones – $0 (Already on hand)
    • 2-part mold putty – $0 (Already on hand)
    • White resin – $14 with coupon (Reg. price $22)
    • Clear resin – $14 with coupon (Reg. price $22)• Magic Glos UV resin – $7 with coupon (Reg. price $11)
    • UV lamp – $22 with coupon (Reg. price $36)
    • Plastic transfer pipettes – $5
    • 2-part pourable silicone – $30 (Ordered enough other things to qualify for free shipping)
    • Additional paints – $20
    • Flatback pearls – $4

    So before I even began, even with the large amount of stuff I already had handy, I ended up spending $116–before Tennessee’s hefty 9.25% sales tax. When all was said and done, it was closer to $130, and I hadn’t even invested the time yet.

    And what a lot of time it took.

    At this point, I probably have close to 20 hours invested in my eye project, and I still only have one pair I’m completely happy with. The rest are lacking, and I’ve encountered more than my fair share of issues with the materials, largely because of the particularly humid climate I live in. Fewer than half the eyes I’ve made have turned out, either because of bubbles in the resin or the resins failing to adhere to each other properly, both symptoms of the local weather.

    Assuming I pay myself my standard commission fee for art/crafts related projects, which is $10/hour, I’ve invested $330 worth of time and resources into the eye making project and I still only have one pair. At the end of the day, I might still just buy eyes from a reputable company, instead of continuing to struggle and/or wait for the perfect weather to come along.

    But I am learning new skills out of it, so take that for what you will. I didn’t save any money, and I’m a long way off from getting what I was aiming for to begin with, but experiences count for a lot.

    I documented my work, as well, while making note of a few pitfalls I discovered along the way. Then I compiled it all into one video, sharing what I learned–minus mention of the costs.

    Curious to see how it went? You can watch the whole process here:

    Happy crafting!

  • Dear Buzzfeed: Stop Ruining Lists

    Nobody likes clickbait.

    A few weeks ago, I discovered the magnificent organization Stop Clickbait, where they take clickbaity articles and post the link along with the answer to the baiting headline. It’s amazing! I only have one issue with it: they classify lists as clickbait.

    There are two kinds of lists that permeate the blogosphere, and sweeping them all into the same “clickbait” category is harmful to the kind that’s actually worth something. And yes, in case you’re wondering, I write a lot of these!

    In defense of those lists, it’s an excellent blog format. It lets bloggers categorize thoughts and ideas under neat headlines that let you, the reader, know if a point is something you want to read about. If it’s a subject you’re already familiar with, or the bullet point is a tidbit you already know, you can skip it. Aside from keeping everything neatly organized, information presented as a list can help save precious minutes of your day.

    And then there’s Buzzfeed.

    I get it–Lists get a lot of clicks. But when people click a list headline, they’re usually expecting useful information, not a collection of 30 GIFs with one-line, opinionated and non-informative snippets written in “hip” language.

    Even worse are the “listicles” (shorthand for list-article, apparently) that offer bullet points and a single line of text on individual pages, rife with popups and obnoxious banner ads, expecting you to click through eight to twelve pages or more to get a tidbit of information.

    It’s awful, because as I said, I love lists. Lists are great. But as that kind of list permeates the internet, it becomes harder and harder for me to tell if a list I click is actually going to be informative, or if it’s going to be… well, clickbait.

    So seriously, Buzzfeed and everyone taking a page from their book, stop messing up our lists. Stop Clickbait is a great idea, but when a major site’s actions drop people like me under a spammy title just because I use lists, I have a problem with that.

    Lists are great. They’re helpful. And when I label a blog post in list format, don’t worry–I promise the only reason I’m naming it “Eight great things about dragons” is because I have detailed articulation that explains those qualities, which I can’t boil down into a few keywords in a headline.

    There’s no clickbait here. I promise.

  • Tea review: Reading Nook Blend black tea from Plum Deluxe

    Tea review: Reading Nook Blend black tea from Plum Deluxe

    When I saw this tea’s ingredients, I frowned in puzzlement. Honestly, I wasn’t sure I’d enjoy it. I couldn’t see how those flavors would work together and couldn’t picture a blend. I’m always hesitant when it comes to lavender, anyway, because I love the smell, but the flavor reminds me too much of laundry detergent.

    Plum Deluxe’s website boasts that this is their best-selling tea. After having my first cup, it’s easy to see what makes it so popular. It’s well named, for one–the flavor really did make me want to curl up with a book, which is pretty much exactly what I did while drinking it.

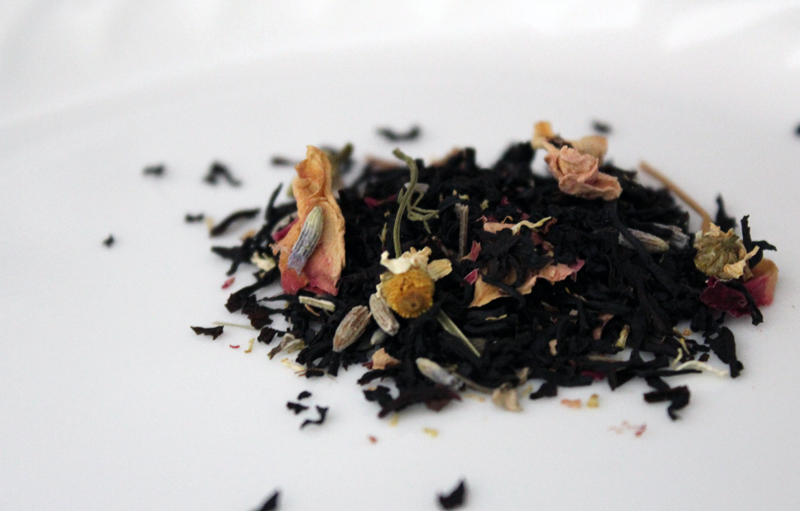
    Plum Deluxe Reading Nook Blend

    For another, it’s probably one of the prettiest teas I’ve ever seen. Black tea mingled with rose petals, lavender, and chamomile. I was surprised and delighted when I got myself a teaspoon for my infuser and discovered the chamomile flowers were whole, beautifully preserved, and still on the dainty stem. That something so delicate would be intact in this tea makes it clear that a lot of care goes into mixing these blends.

    The tea brewed with a slightly spicy scent that surprised me, soothing and welcoming. The black tea base is mild, letting the sweet, fruity-floral taste dominate a straight cup. There was no bitterness, a warming flavor, and a delightful spiced note that reminded me of everything I like best about chai teas.

    The addition of sweeteners brings out the floral tones, downplaying the hints of spice, letting the tea through a little louder. And the addition of milk mellows it out, making the flavor milder, less floral, but bringing back just enough of the spice notes to make a really soothing drink.

    Pleasant in every form, I’d drink it straight in the evenings to unwind, or first thing in the morning with a bit of milk and sugar for a delicious but not overpowering breakfast tea.

  • Easy alterations to repurpose old doll clothing

    Easy alterations to repurpose old doll clothing

    Every time I clean an area in my house, I try to get rid of some things to prevent it from becoming cluttered again. It helps keep us comfortable in our little house, and being able to walk into the closets is always a plus.

    Last time I cleaned and organized the closet in my workshop, I ran across my old porcelain doll from when I was a little girl. She was pretty, but since my taste in dolls has evolved, I didn’t see a reason to keep her. But I’d often read about people using clothes from porcelain dolls to dress their ball-jointed dolls, and since Laele didn’t have any clothing of her own yet, I decided to try the dress on her.

    Laele's new dress before alterationSince the nYID body is so curvy and I got her with a larger bust option, I wasn’t sure it would work. To my surprise, the bodice fit as if the dress were made for her. The problem area was much lower–the porcelain doll was a standard 18″ size, while Laele is a good bit taller than that.

    Still, I was pleased. I could dispose of the old doll and still get a dress for one of my newer dolls. And with a really easy alteration, I’d have a pretty dress with little cost and little work. It’s fitting for her station, too, if not her personality, something I think suits her story fairly well; she’s a bit more adventurous, but her family a bit more traditional, so it makes sense that her father–a spice merchant–would provide her with over-the-top frilly dresses, fit for afternoon tea rather than gallivanting across the country.  It also came with the bonus of being pink, a complementary color for her unnaturally green hair. Don’t worry–the hair is part of her story, and it’ll be explained once I get her book written.

    Adding lengthFinding materials was actually the hard part. I looked at Hancock Fabrics, hoping to score something I could use for cheap, since they’re closing. But on top of not having much to choose from to begin with, there was a 30 minute wait to check out and only two people working, both of whom were very rude, so I decided to look elsewhere.

    I visited several other stores and eventually found something I could work with at Hobby Lobby, which is fortunate, since it was my last option for buying something locally. I couldn’t find any pink satin that matched well, so I settled for a lighter shade and figured I’d cover the whole thing with lace. The lace I got was a pretty pattern in ivory, gathered onto elastic. That it was pre-gathered saved me a lot of effort, and that it was on elastic made it easy to attach to the satin.

    I cut a piece of satin that was 8 inches wide and 44 inches long, adding a rolled hem to one edge and only finishing the other with a zig-zag stitch to keep down bulkiness. Then came the time consuming process of pinning yards and yards of lace onto the new addition. I put on three rows and then added the new ruffle to the bottom edge of the dress. The stitching ran along the existing hem stitching, and the crown of one ruffle hid the seam, creating an attractive blend.

    Then came time for photos.

    Laele's new dress

    The end result was quite pleasing, and I’m glad I decided to keep the dress and send the doll on to a new home. From now on I’ll have to keep an eye out for porcelain dolls at thrift shops and the like–you never know when I might find one that’ll have a dress just right to add to Laele’s wardrobe.

  • Hand-me-downs and motherhood

    There are some challenges that come with parenthood that people don’t tell you about. They’ll warn you of sleepless nights and spectators when you just want to use the bathroom alone. They’ll warn of messy kitchens and mountains of laundry and the way you’ll worry, sitting up at night with a sick little one.

    But they don’t tell you that you’ll lose yourself.

    They don’t tell you that every mother ends up overwhelmed and lonely, even when people come to visit or help.

    They don’t tell you that trying to look after a child is such an all-consuming feat that everything else ends up being put aside to make it a little easier to wash a little person’s underwear because they’re mysteriously out of clean pairs, or wash a floor your shoes have been sticking to all day. Hobbies and interests stop existing for a while, because there’s simply no time. Time for these things will return eventually, but sometime, things come together in a curious way that makes everything seem far worse than it is.

    Growing up in a large family, the idea of hand-me-down clothing was nothing new. Shoes rarely lasted long enough to be passed down, but clothing cycled from one kid to the next. Since I was the eldest girl, I rarely fell into this cycle. My parents would occasionally be gifted bags of previously-loved clothing from friends or coworkers, but for the most part, I got new clothes.

    There’s an important form of self-expression that comes through clothing, and often we’re not even aware that it’s happening. We pick things we like or things we feel look good on us, without ever considering our choices. Our clothing lets us reflect our personalities on the outside, helping form a clear idea of who you are. But when your clothes are hand-me-downs, this freedom of expression is stripped from you.

    Raising kids is as expensive as it is time-consuming. Clothes shopping with a toddler is a nightmare, and trying to check tags and scout out the things you can afford just doesn’t happen. So after our little one joined the family, I jumped at every offer of hand-me-down clothing, both for her and for me. It saved time, it saved effort, and it saved a fortune.

    And yet it led to the slow replacement of the things in my drawers, my carefully curated collection of clothing assembled over the course of years. My own hand-chosen clothing wore out and was thrown away. Over time, I came to own a myriad of clothing from brands I’d heard of but didn’t wear and from stores I’d never visited. And then one day I opened a drawer to get dressed in the morning, and I was already having a bad day, and as I looked in at my clothing, I realized no part of myself was left in those drawers.

    The shirts with words portraying my sense of humor, the shirts depicting characters from my favorite video games and movies, the shirts representing my favorite bands–all primarily black and dark clothing–were gone, save a few which were already in the hamper from the weekend.

    Instead I was left with neon bright and pale clothing from Aeropostale, American Eagle and Hollister. I wore logos from stores I’ve never even set foot in, in colors I’d never dream of. And when I looked at myself in the mirror, I wasn’t entirely sure who was in that first glance.

    That was the moment when everything came together for a pitiful afternoon of gutting my closet and discovering none of my old favorite dresses fit any more, all my favorite pants were worn out and torn at the pockets or the knees, and though the classy Korean clothing I’d imported a year before still fit, it was too warm outside to wear any of those long-sleeved fashions. I was stuck in someone else’s wardrobe, and I spent the day feeling like I was stuck in someone else’s life. Logically, I realized that wasn’t the case, but it still led to an uncomfortable and sort of surreal experience.

    I’ve since found myself unhappy every time I open my dresser drawers, but the good news is it’s easy to remedy; a month or so to save money, and a weekend to shop for things that put the essence of me on the outside. A small problem, something most would label as a first-world problem, but a problem, nonetheless.

    So to my younger sisters: I’m sorry for the hand-me-downs.